Annuals vs Perennials
Annuals vs Perennials
If you’re new to gardening, the words annuals and perennials can sound a little technical — but they’re really just about how long a plant lives and what you can expect from it year to year. Once you understand the life cycle of each, planning your garden gets way easier (and honestly, way more fun).
Annuals are plants that live for one growing season. They sprout, grow, bloom, set seed, and then they’re done when frost hits. The upside? They usually bloom their hearts out all summer and can give you big, bold color right away. The downside? You’re replanting them every single year. They’re perfect if you want quick impact, a pop of color in containers, or something showy to brighten up your front steps.
Perennials, on the other hand, are the “come back and visit me next year” plants. They live for multiple years, and even though they die back in winter, their roots stay alive underground and return when the weather warms up. Some perennials focus on roots the first year and don’t look like much until year two — but once they’re established, they’re reliable, low-maintenance, and they build a garden that gets better with time.
I’ll be honest: I’m a perennial girl through and through. I don’t do annuals unless I have a small spot open to fill. I only plant perennials because they can come back year after year, and I love the way a garden matures and gets fuller as the seasons pass. Over time, you’re not starting from scratch — you’re layering onto something that already has a beautiful foundation.
Coulee Region Gardening (My Curated Garden from my Last Home)
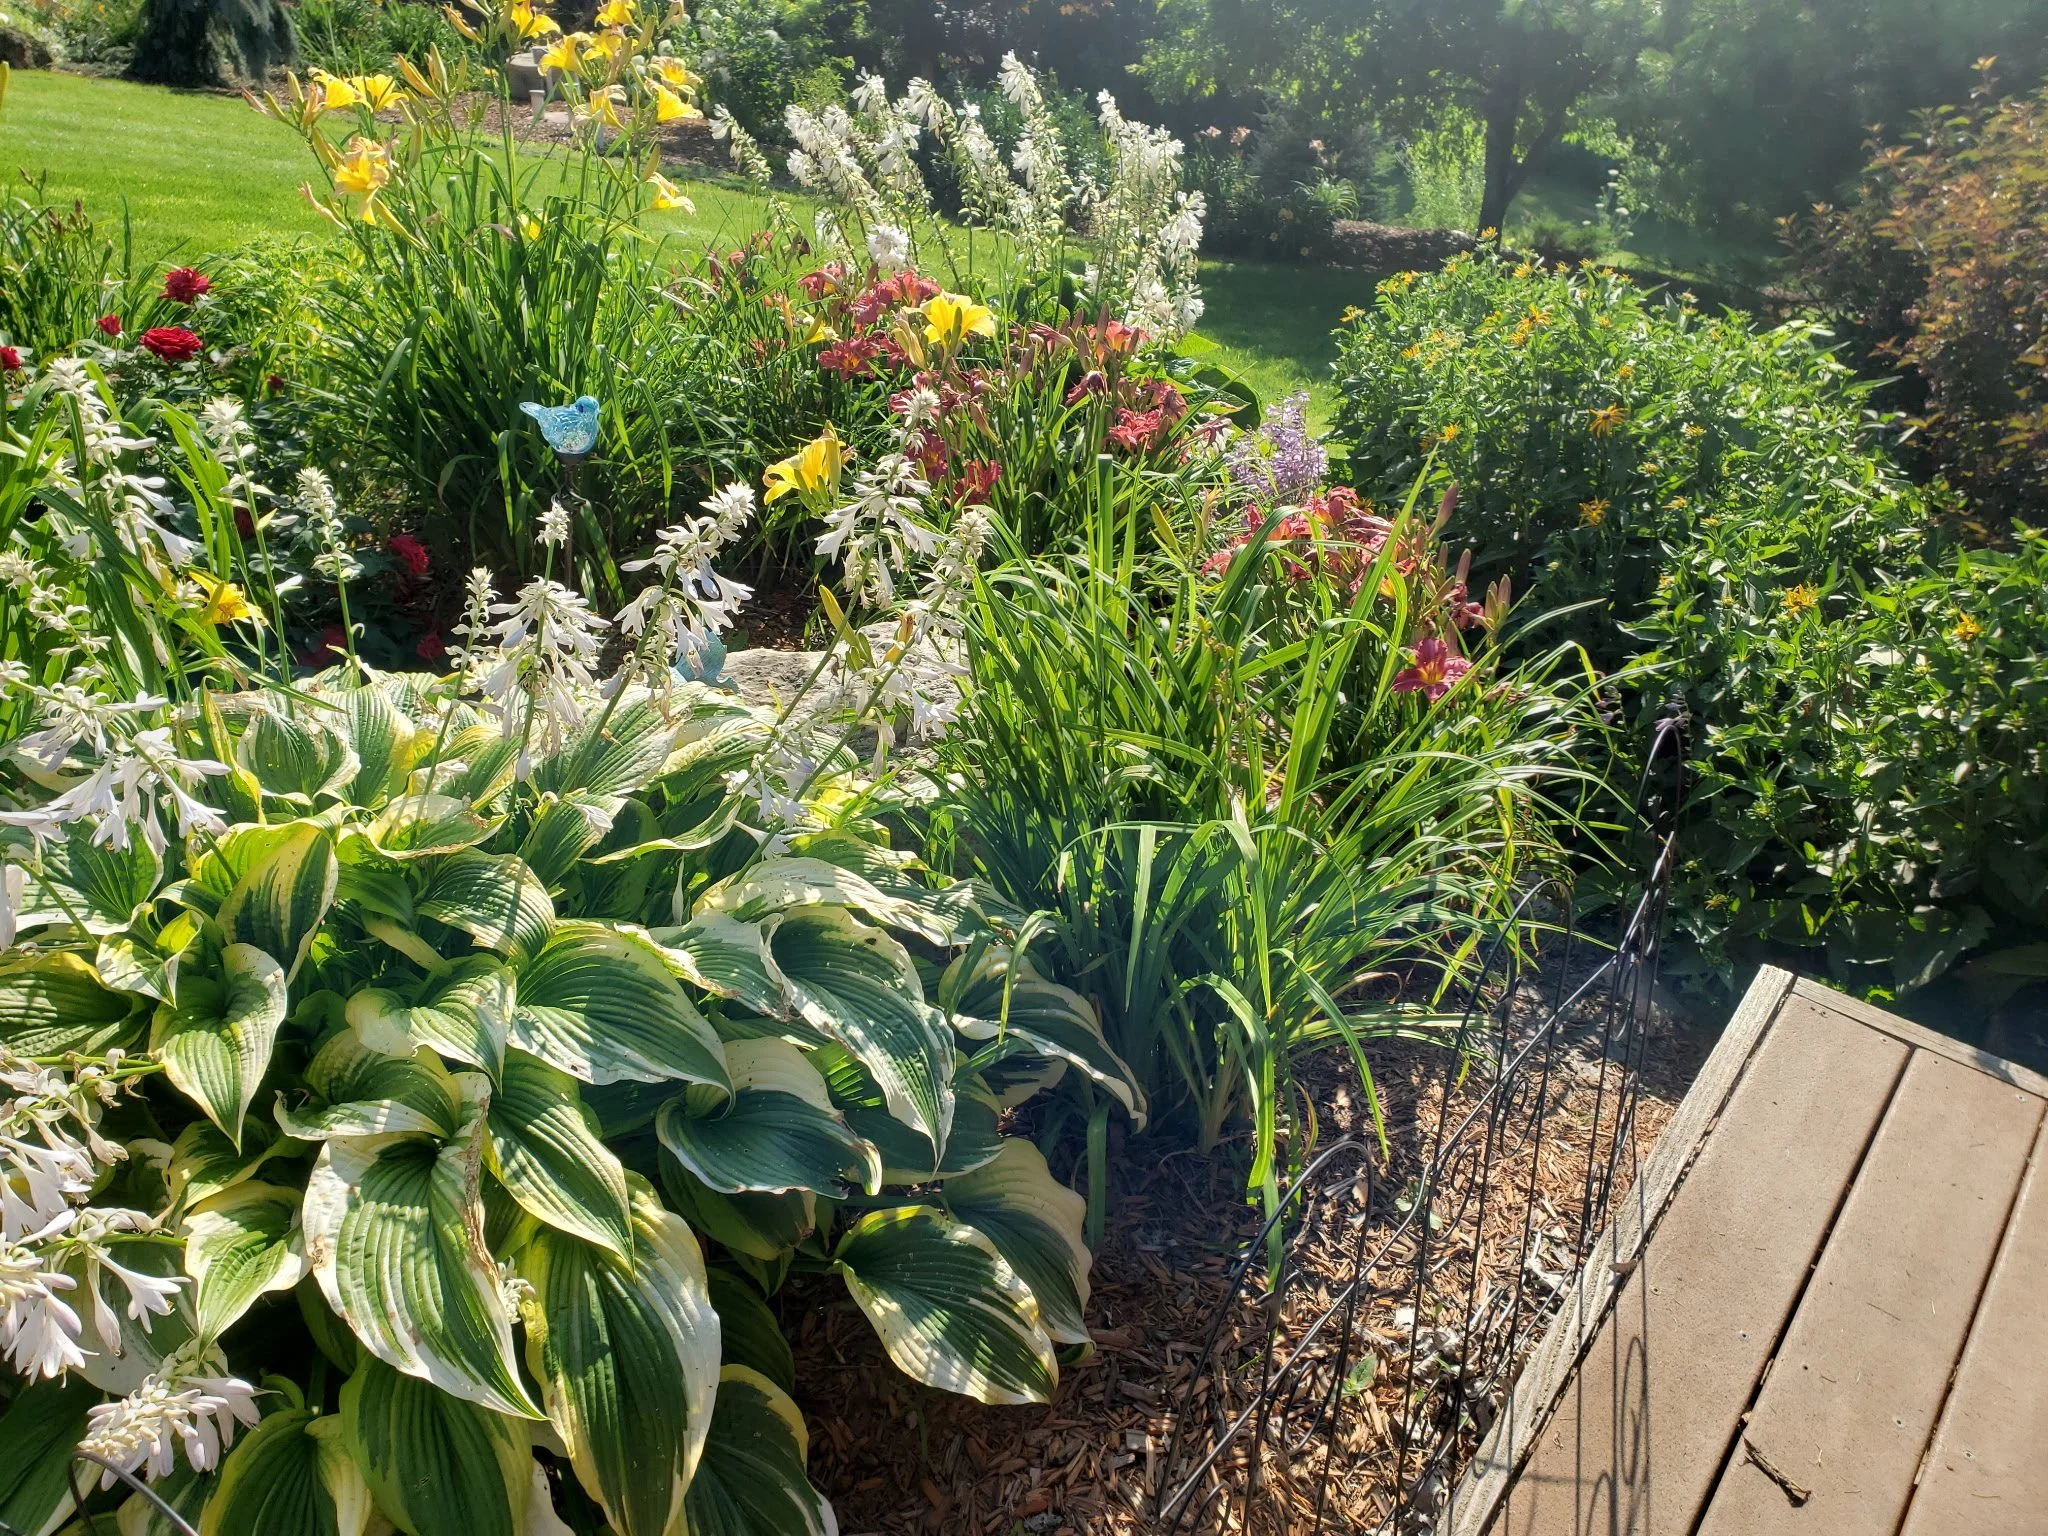
Now here’s the part that matters most to me: I want every section of my garden to have something blooming. I have finally cracked the code to have something blooming the entire spring until fall, and that’s really the secret to a garden that always looks full and cared for — even when you’re not out there fussing with it every day. The trick is choosing perennials with staggered bloom times: early spring bloomers, mid-summer workhorses, and late-season stars that carry you right into fall.
So if you’re standing in the garden center wondering what to pick, here’s my simple way to think about it: use perennials to build your “forever garden” structure — the plants that come back, fill in, and make everything feel established. Then, if you have a bare spot, a new bed you’re still building, or a little area that needs extra color, that’s when annuals can be a helpful finishing touch. Start with the plants that return, and everything else becomes optional.
One thing I pay attention to when I’m choosing perennials is how they behave over time. Some perennials stay politely in their lane (clumping types), and others will spread and fill space (creeping or self-seeding types). Neither is “bad” — you just want to know what you’re buying so your garden doesn’t feel chaotic two summers from now. I also think in layers: taller plants in the back, mid-height bloomers in the middle, and low growers along the edges to keep beds looking tidy. Then I repeat plants in small groups instead of doing “one of everything,” because repetition is what makes a garden look intentional and full, not like a plant sample sale.
And if you want that always-in-bloom look from spring through fall, it’s really about planning your bloom calendar and mixing in a few “support players.” I pick a handful of perennials that bloom early, a set that carries the middle of summer, and a few that hit late — but I also make sure I’m including plants with long-lasting foliage or interesting texture so the garden still looks beautiful when something isn’t flowering. Deadheading can stretch bloom time for certain perennials, and cutting some plants back after their first flush can even encourage a second round later in the season. That’s how you get that steady, full, layered look without constantly replanting — you’re working with the life cycle of the plants instead of fighting it.
- Kim in the Garden
Gardening in the Winter
It All Begins Here
Winter gardening in Central Wisconsin looks a little different than what you see online — it’s not about planting in January, it’s about protecting what you already built and setting your garden up to explode in spring. For me, winter is the season of maintenance and prevention. It’s the quiet work that makes everything look effortless later, especially when you’re dealing with evergreens, snow, wind, and the never-ending layer of “stuff” that blows into your beds.
The first thing I do every spring (and sometimes on those warmer winter days when I can get outside) is clear all debris that comes in from winter. Here in Central Wisconsin we have a lot of pine needles that end up in the flower garden and if you don't remove them they can kill a lot of my perennials. People underestimate how quickly those needles can mat down — they don’t just sit there looking messy, they create a thick blanket that blocks sunlight and traps moisture right against the crown of the plant.
Evergreens are beautiful, but they definitely change what happens in your garden beds. Pine needles and evergreen litter break down slowly, and while they’re decomposing they can shift the soil environment over time. You’ll hear a lot of talk about pine needles “making soil acidic,” and while it’s not as dramatic as people think, the bigger issue is what they do physically: they form a dense layer, shed water differently, and can keep the soil underneath cold and wet longer into spring. That combination is rough on perennials that want airflow around their base, especially the ones that hate sitting in soggy, compacted conditions.
And because my soil is sandy, I pay even closer attention. Sandy soil drains fast, which is a blessing in a wet spring — but it also means it doesn’t hold nutrients as well, and it can swing between too dry and too wet depending on what’s sitting on top of it. When pine needles pile up, they can create a “roof” that sheds water away from the root zone in some spots, while trapping moisture in others. So you get weird little microclimates right in the same bed: one plant is staying too damp at the crown, another plant is drying out underneath a needle mat that’s preventing water from soaking in evenly. That unevenness is where you start seeing perennials struggle, thin out, or just not come back as strong.
Note* the sandy soil in the bottom left of the photograph (My Home Garden)
Another thing evergreens do is compete — not always in an obvious way, but in a very real way. Their roots can be thirsty, and if you have beds near pines or spruces, you’ll notice the plants closest to them can look stressed sooner in summer. In winter, that evergreen canopy also changes snow cover. Some areas get insulated by snow, and others get wind-scoured and exposed. Perennials that would normally be protected can end up dealing with freeze-thaw cycles, which is hard on the roots and crowns. That’s why my “winter gardening” mindset is really about controlling what I can control: debris, airflow, and consistency.
So here’s what I actually do. I rake or gently lift pine needles out of beds as soon as I can, especially around the base of perennials — I want the crown visible and breathing. If needles are tangled into a groundcover, I loosen them with my hands instead of ripping, because I’m not trying to damage what’s already established. Then I check for any spots where debris has created a thick mat and I thin it out. Think of it like brushing out hair: you’re not trying to strip everything bare, you’re just preventing that suffocating layer from forming.
Once things are cleaned up, I top-dress strategically. With sandy soil, I love adding compost in spring because it helps hold moisture and nutrients, and it gives my perennials a stronger start. If I’m mulching, I keep mulch a few inches away from plant crowns — same concept as the pine needles — because air circulation is everything. And if a bed is right under evergreens, I’m extra intentional about plant choices: tougher, more forgiving perennials go there, and the divas get the better real estate.
Winter can feel like a dead season, but it’s honestly when a lot of garden success gets decided. In Central Wisconsin, the evergreens aren’t going anywhere — so instead of fighting them, I manage what they drop, how it sits, and how it affects my soil. The payoff is huge: healthier perennials, fewer losses after a rough winter, and beds that wake up fast and full when spring finally decides to show up.
-Kim In the Garden
The Vegetable Garden
What Saved Time in my Vegetable Garden
The past few summers, the one thing that truly saved me the most time in my vegetable garden was using landscape fabric (also called weed barrier or garden ground cover) across my raised beds. Over the years I’ve learned that a productive garden doesn’t have to mean spending every spare minute weeding, and this was one of those simple changes that made everything run smoother from planting season all the way through harvest.
Weeds were always the biggest time-stealer. They weren’t just annoying — they competed with my vegetables for water, nutrients, and space. Once the summer heat kicked in, it felt like weeds could show up overnight. The landscape fabric helped prevent that cycle because it blocked sunlight from reaching weed seeds, so they couldn’t sprout and take over the beds in the first place.
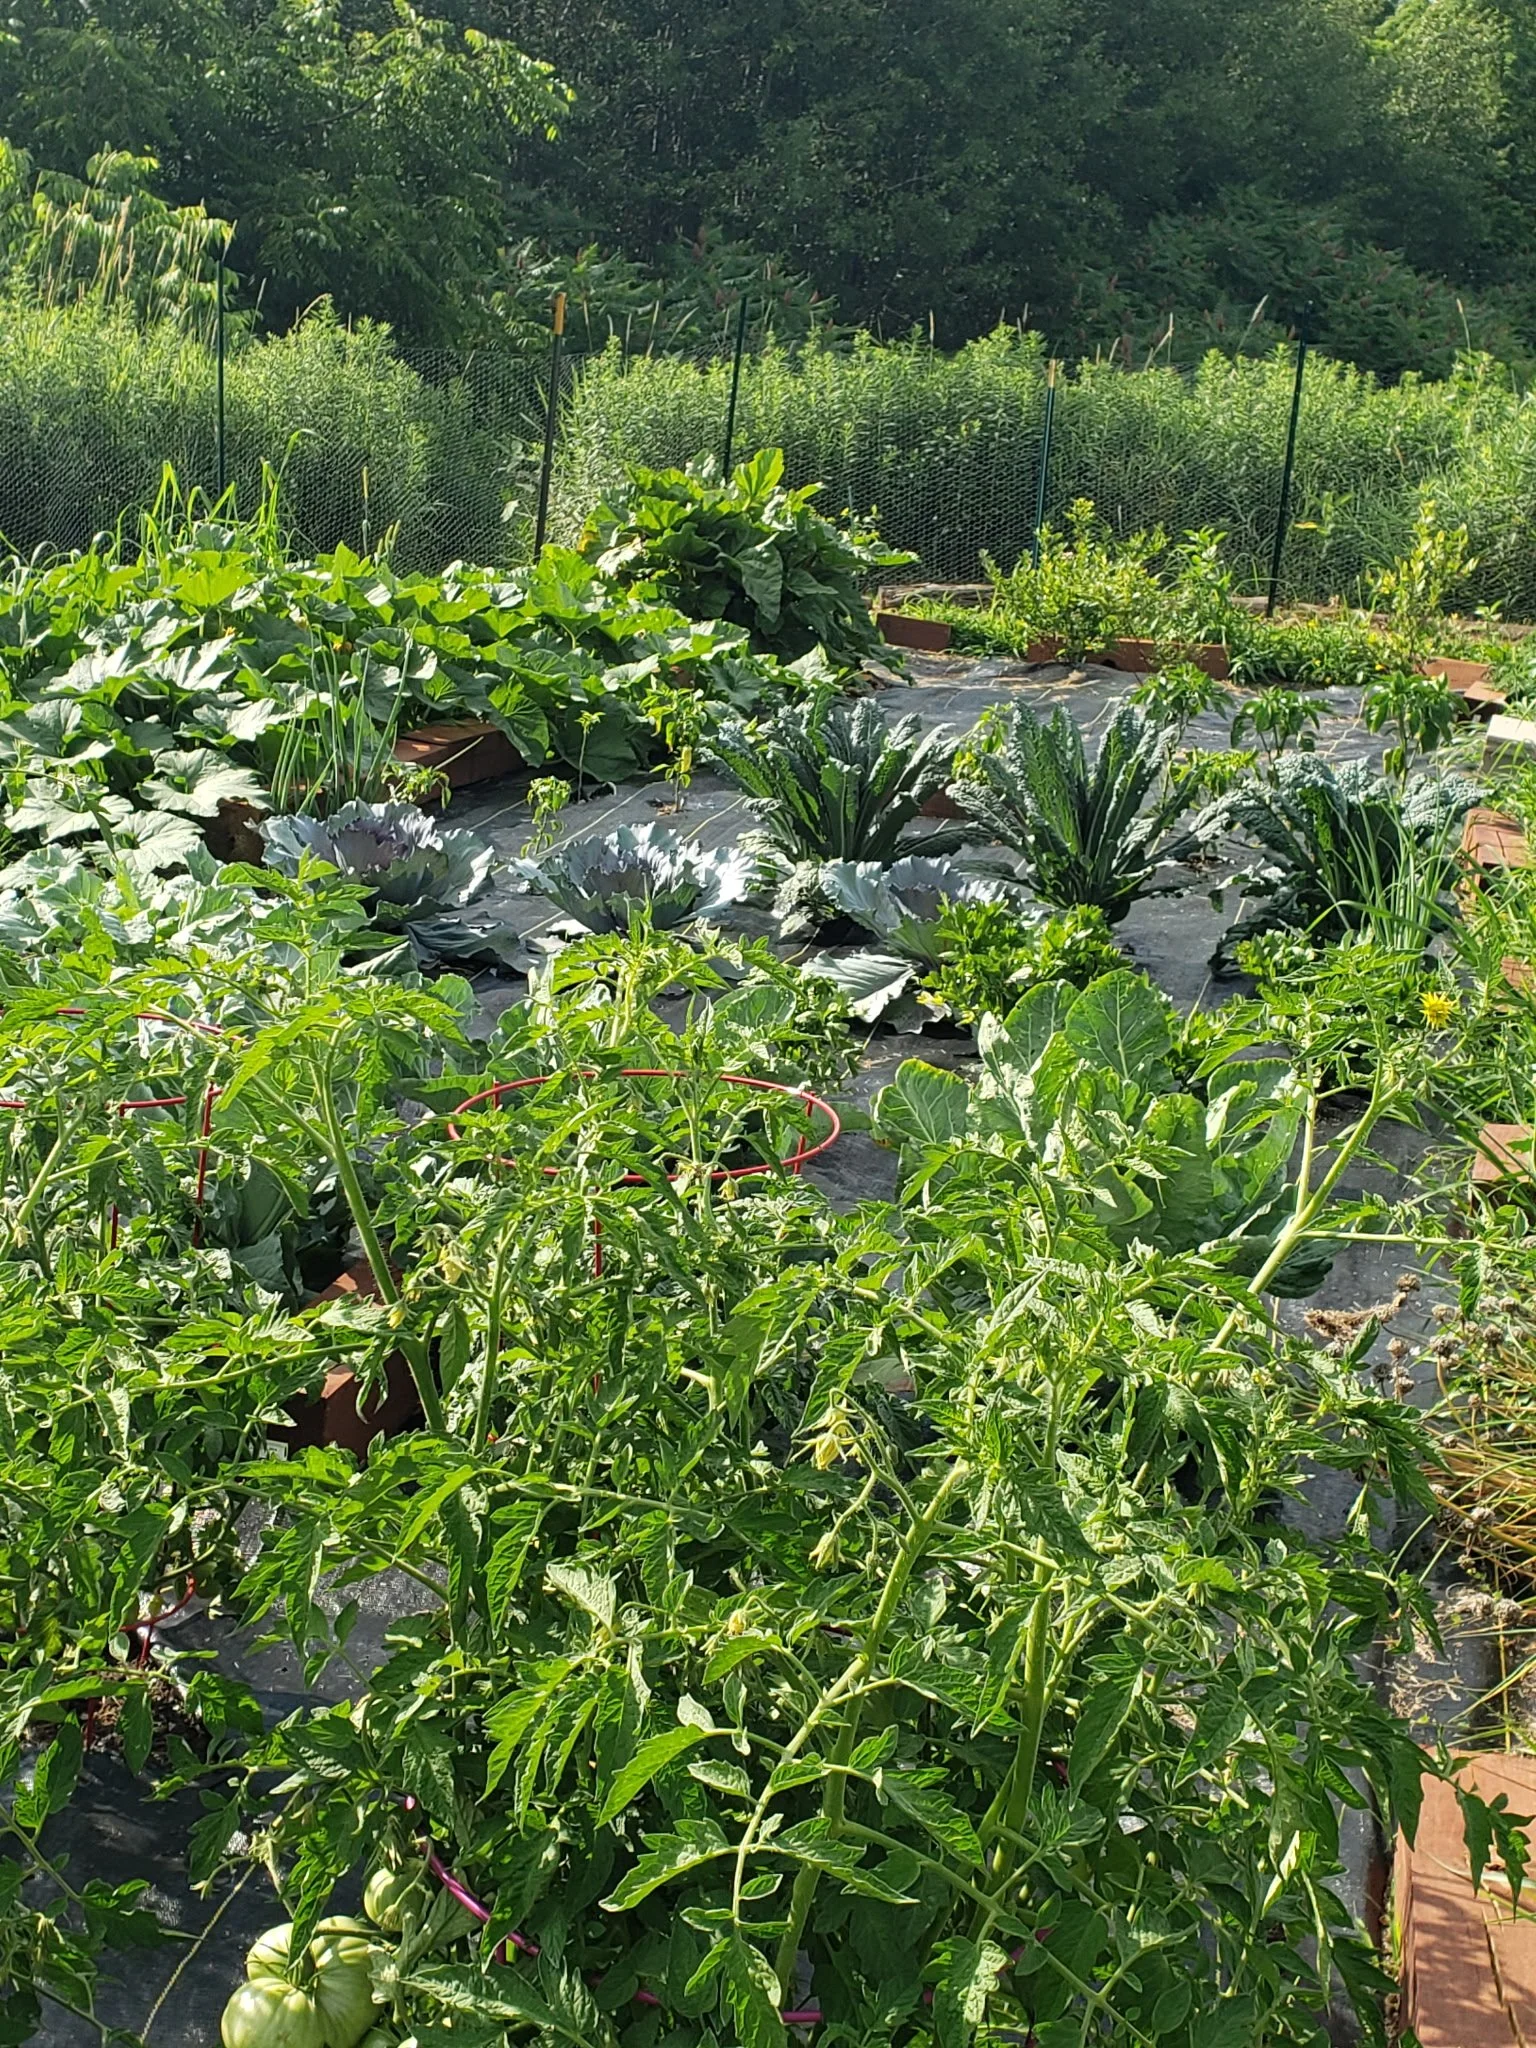
Landscape Fabric (My Home Garden)
One of the things I appreciated most was how much more organized the garden stayed. The beds looked tidy, my rows stayed clear, and I could easily see what was planted where. Even when everything was growing quickly, the garden still looked cared for — not like I was constantly playing catch-up.
It also kept things cleaner after heavy rains. Bare soil used to splash up onto leaves and produce, and that always meant extra cleanup and sometimes more plant trouble than I wanted to deal with. With the fabric covering the soil, there was less splashing, less mud, and the vegetables came out of the garden looking much cleaner at harvest time.
The fabric helped with watering too. During hot stretches, it reduced evaporation and helped the soil hold moisture longer. I didn’t feel like I was constantly out there watering just to keep things from drying out. The moisture stayed more consistent, which made a difference in how steady and healthy the plants looked.
In Central Wisconsin, I also noticed the soil warmed up faster in the earlier part of the season. That dark surface absorbed heat, and it helped warm-weather crops settle in once they were planted. It wasn’t a dramatic change, but it was enough that everything seemed to get established a little more easily — especially when spring nights still had a chill.
I kept the process simple. I laid the landscape fabric down tight, anchored it well so the wind couldn’t lift it, and cut openings only where I planted. That meant less exposed soil and fewer opportunities for weeds to creep in. It also made my quick garden checks much quicker — I could tie up tomatoes, check growth, pick what was ready, and move on without a long list of cleanup tasks staring at me.
I also kept in mind that weed barrier fabric was a tool, not a replacement for good soil. I still added compost and paid attention to keeping the beds healthy and productive. The fabric made weed control in the vegetable garden easier, but the vegetables still needed nutrients to grow and produce well.
Looking back, this was one of the best methods I used last summer to reduce weeding and save time in my garden. If someone asked me for a practical tip for how to prevent weeds in a vegetable garden, I’d tell them to try landscape fabric in one bed first and see how much time it saves. For me, it made the garden easier to manage, cleaner to harvest from, and a lot more enjoyable from start to finish.
-Kim in the Garden